Learning how to paint a moon with acrylics is easier than you think. While moon photographs show complex craters and shadows, you can recreate that celestial beauty using just four paint colors and simple sponge-dabbing techniques — no advanced skills required.
This step-by-step tutorial shows you exactly how to paint realistic moon art, from creating a dark sky background to adding glowing atmospheric effects. Whether you're painting home décor or exploring celestial artwork, this project takes about an hour and delivers stunning results.
Let's break down the materials and techniques you need to create your own moon painting today.
Celestial bodies are very popular for décor today, the moon is number one among them. Let's follow trends and add an edgy touch to your artworks and home décor making some amazing DIY moon art decorations for your home. This tutorial will guide you through the whole process.
Painting a moon can be kind of intimidating. If you observe photographs of moons, you will notice there are various dark and light blotches.
The artwork will take some time but the resulting piece is very cool, get inspired and make one for yourself. Let's get started!
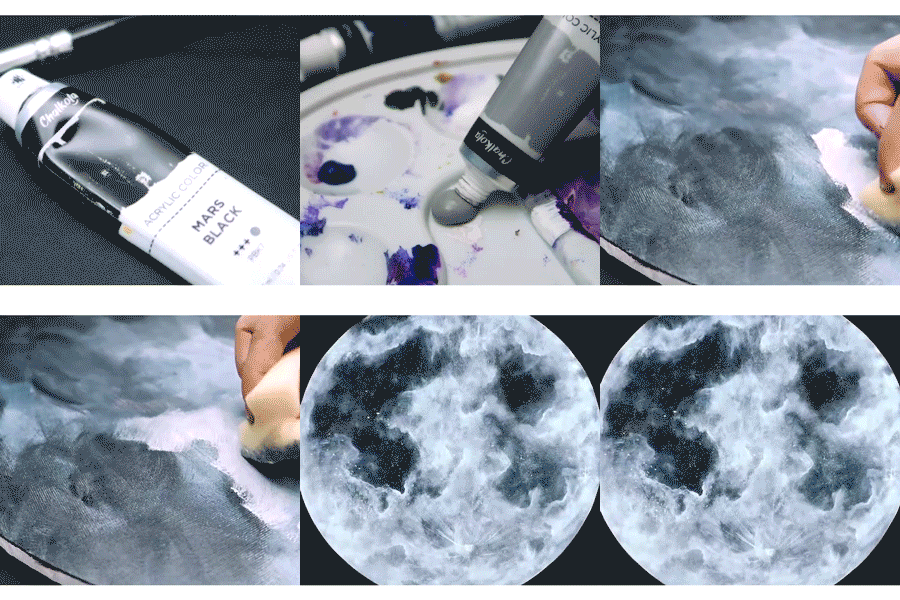
Once you are ready, squeeze out Phthalo Blue, Titanium White and Cold Gray on your palette.
Paint the sky base
Use all the three colors to paint the entire surface of your canvas board.
Sponge in the moon body
Let the paint dry. Now using a sponge, create gradients using Titanium White and Mars Black. This would create the crater and blotch effect of the moon. Blend black in various dark areas of the moon.
Splatter for star texture
Using a brush, sprinkle and splatter Titanium White color to create the little dots and lines for texture.
Build a second white layer
Using Titanium White, paint the second layer for the blotch effect.
Soften the corners
Use a small brush to blend the outer corners.
Final crater detail
Use a round brush to paint small dots and craters on the moon.
This was a fun challenge! Thanks for viewing this tutorial. We can't wait to see how your moon turned out — happy painting!
Understanding moon painting techniques
The key to realistic moon paintings lies in layering texture rather than precise detail. Real moon surfaces show three distinct features: the bright lunar highlands, dark maria (volcanic plains), and thousands of impact craters.
When you paint a moon with acrylics, you replicate these features using contrast and texture. The sponge-dabbing method mimics the pockmarked surface without requiring fine brush control, making this technique accessible even if you've never painted celestial bodies before.
Professional moon artwork often uses a limited palette — typically blacks, whites, and grays — because the moon itself reflects light in grayscale. Adding a hint of blue creates atmospheric perspective, the same effect you see when viewing the moon through Earth's atmosphere.
The most common mistake beginners make is over-blending the craters. Real lunar surfaces show sharp contrast between sunlit areas and deep shadows. Keep your sponge dabs distinct rather than smooth, and resist the urge to blend everything together.
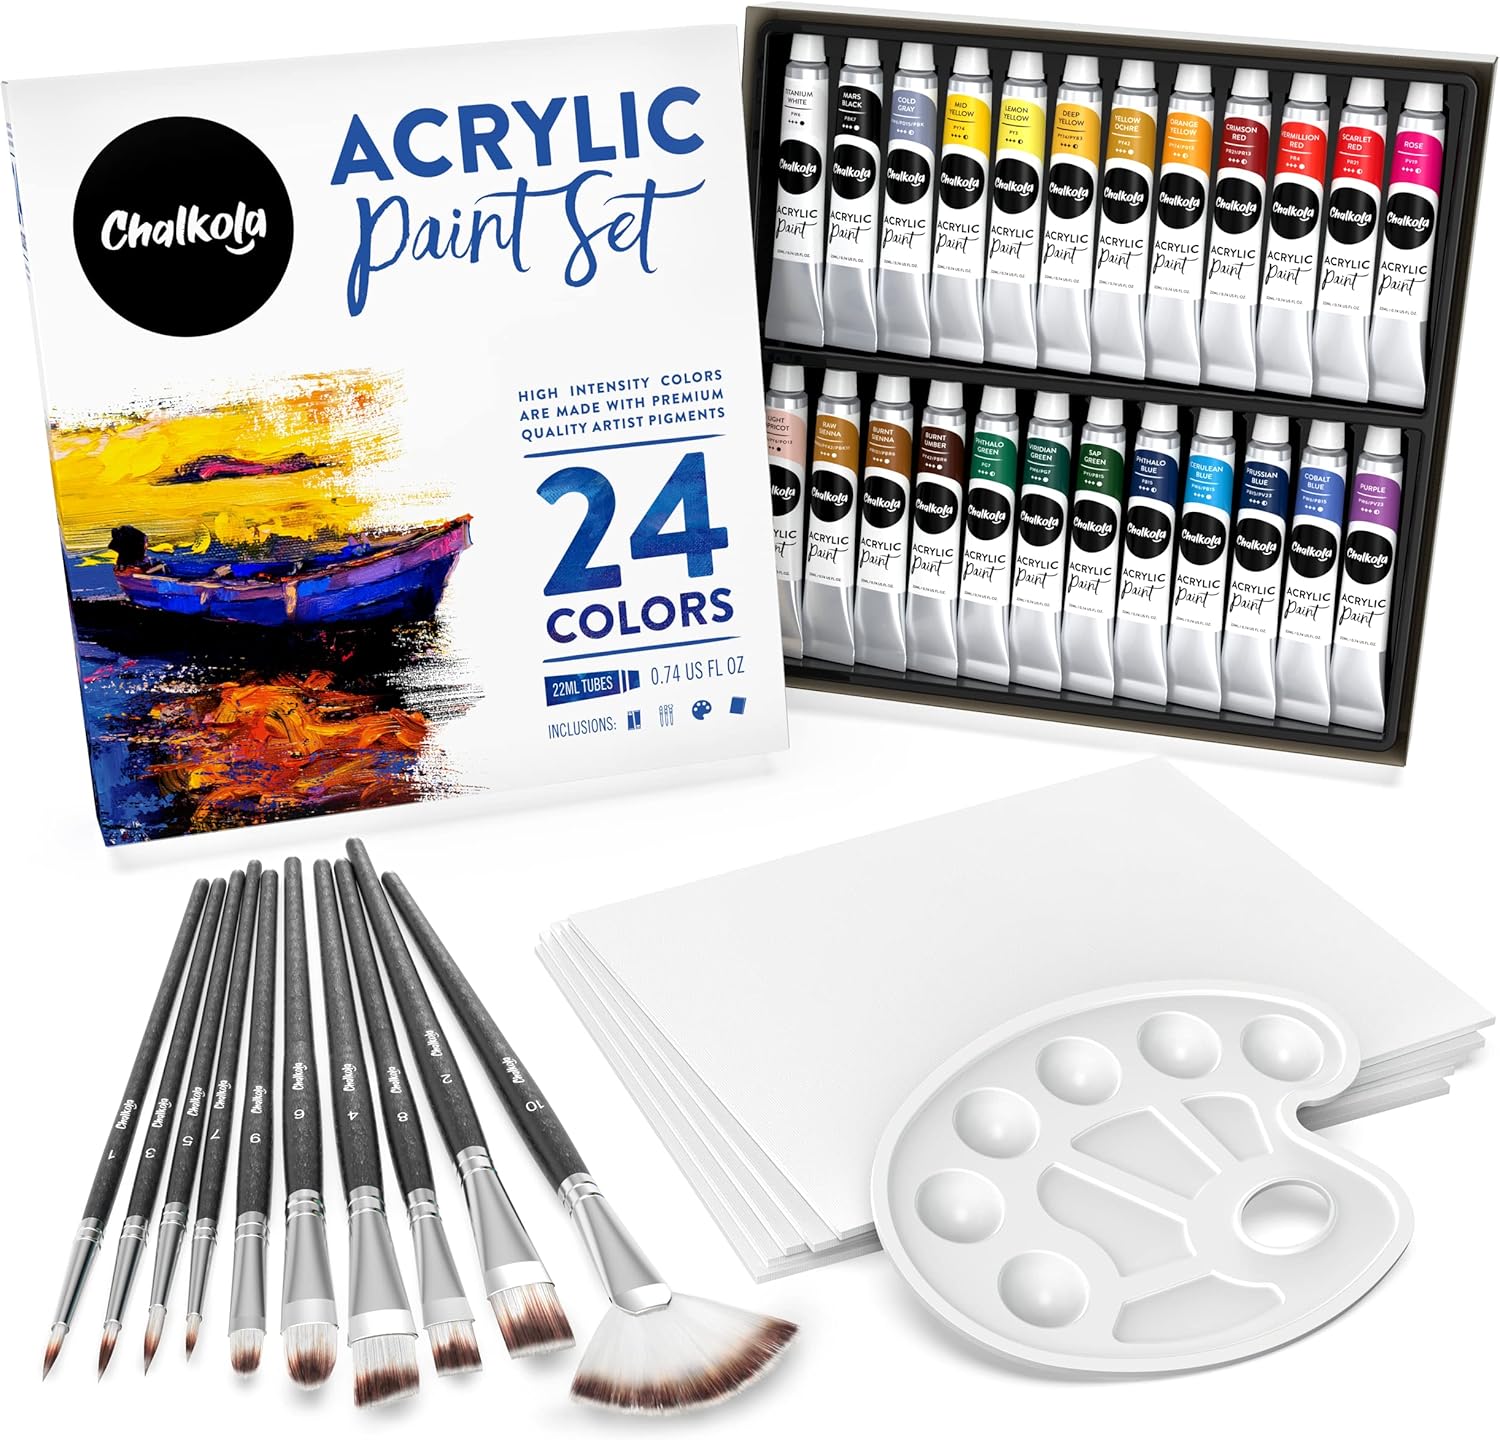
A few advanced flourishes can lift a beginner moon into gallery-worthy territory: ejecta rays (faint white streaks radiating from the largest craters, painted with thinned white and softened with a Q-tip while wet), a water-reflection band below the moon (horizontal white strokes in a triangle that's narrow at the top and wider at the base — instantly transforms a sky into a moonlit lake scene), and dry-brush wispy clouds dragged across the sky with a wiped-down round brush so the bristles barely kiss the canvas. Get the 24-Color Acrylic Paint Set on Amazon →
An alternative beginner-friendly approach skips the brush entirely: acrylic pouring uses a swipe, flip-cup, or dirty-cup pour to let layered white, silver, and black paint create cell-like crater texture on its own. Pourers consistently say it looks more like a real moon than sponging — and the cells naturally simulate the pockmarked surface without any rendering. Get the 32-Color Acrylic Paint Set on Amazon →
Choosing the right canvas and paint for moon art
Canvas panels work better than stretched canvas for moon paintings because the rigid surface prevents flexing while you apply sponge texture. An 8×10 inch panel provides enough space to create detailed craters without becoming overwhelming for a first project.
For paint selection, acrylic offers significant advantages over oils or watercolors when painting celestial artwork. Acrylics dry in 10–15 minutes between layers, letting you build up crater shadows and highlights quickly. The opacity of acrylic paint means your white moon will cover the black background completely in just two coats.
The four essential colors for moon painting are Mars Black (deep space), Titanium White (lunar surface), Cold Gray (crater shadows), and Phthalo Blue (atmospheric glow). Professional acrylic paint sets include all these shades plus dozens more for future projects.
Avoid student-grade paints with low pigment loads — they require many coats to achieve opacity, which muddies your moon's surface texture. Artist-grade acrylics give you brilliant whites and true blacks that make your moon artwork pop against the night sky.
For brushes, three sizes cover everything: a 3/4-inch flat wash for the night sky, a #8 medium round for crater shadows, and a 2/0 small detail brush for the white highlight rims and tiny stars. Tutorials that ask for ten brushes are over-specifying — the same painting comes out beautifully with these three. If you'd rather paint pen-style for the fine details, our Chalkola Acrylic Paint Markers give you crisp dot stars and crater-rim highlights without bristle fuzz.
A reference photo is the secret most beginners skip. Pull up a high-resolution full-moon photograph on your phone or print one out — real lunar craters cluster unevenly (most pile near the upper-left in the standard view), some maria are larger than others, and the brightest highland is almost never dead-centre. Painting from a reference fixes the "blob with random dots" problem and instantly makes your moon look real.
Moon painting is the acrylic technique of building a luminous lunar surface with sponged texture, layered shadow, and a soft atmospheric glow on dark sky. The classic colour palette is Mars Black, Titanium White, Cold Gray, and Phthalo Blue — four colours, applied in three layers (background, body, glow) over roughly an hour.
Unlike portrait or landscape work, moon painting rewards texture over precision. The technique is forgiving because real lunar surfaces are irregular by nature — sponged dabs, splattered stars, and dry-brush halos all read as authentic. That's why it remains one of the most-painted subjects for beginners, alongside florals and seascapes.
Art history
Famous moon paintings to study
Three masterworks every moon-painter should know. Each one solves a different problem — emotion, light, atmosphere — and the techniques transfer directly to your own canvas.
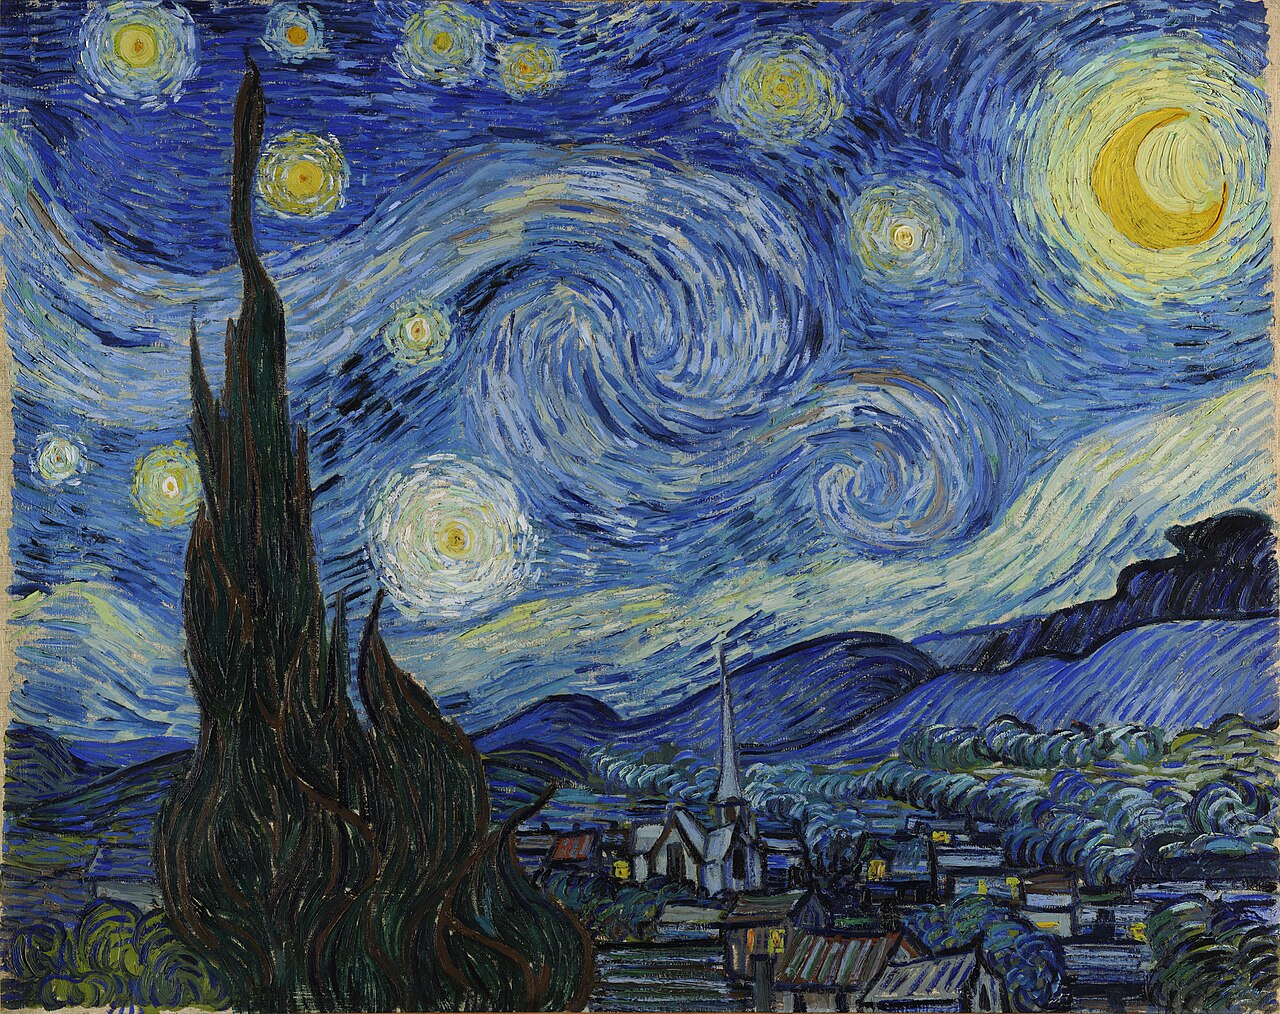
Vincent van Gogh · 1889
The Starry Night
A glowing crescent moon swirls beside turbulent stars over a sleeping village. The most-recognised moonlit painting in history — held at MoMA in New York.
What we learn: exaggerated halo glow + thick, directional brushstrokes give the moon energy. You don't need realism — you need movement.
Caspar David Friedrich · 1819–20
Two Men Contemplating the Moon
Two figures gaze at a glowing crescent moon through a forest at dusk — the quintessential Romantic moonscape, held at the Galerie Neue Meister in Dresden.
What we learn: tiny moon, vast sky. Scale your moon down and the surrounding silence does the emotional work.
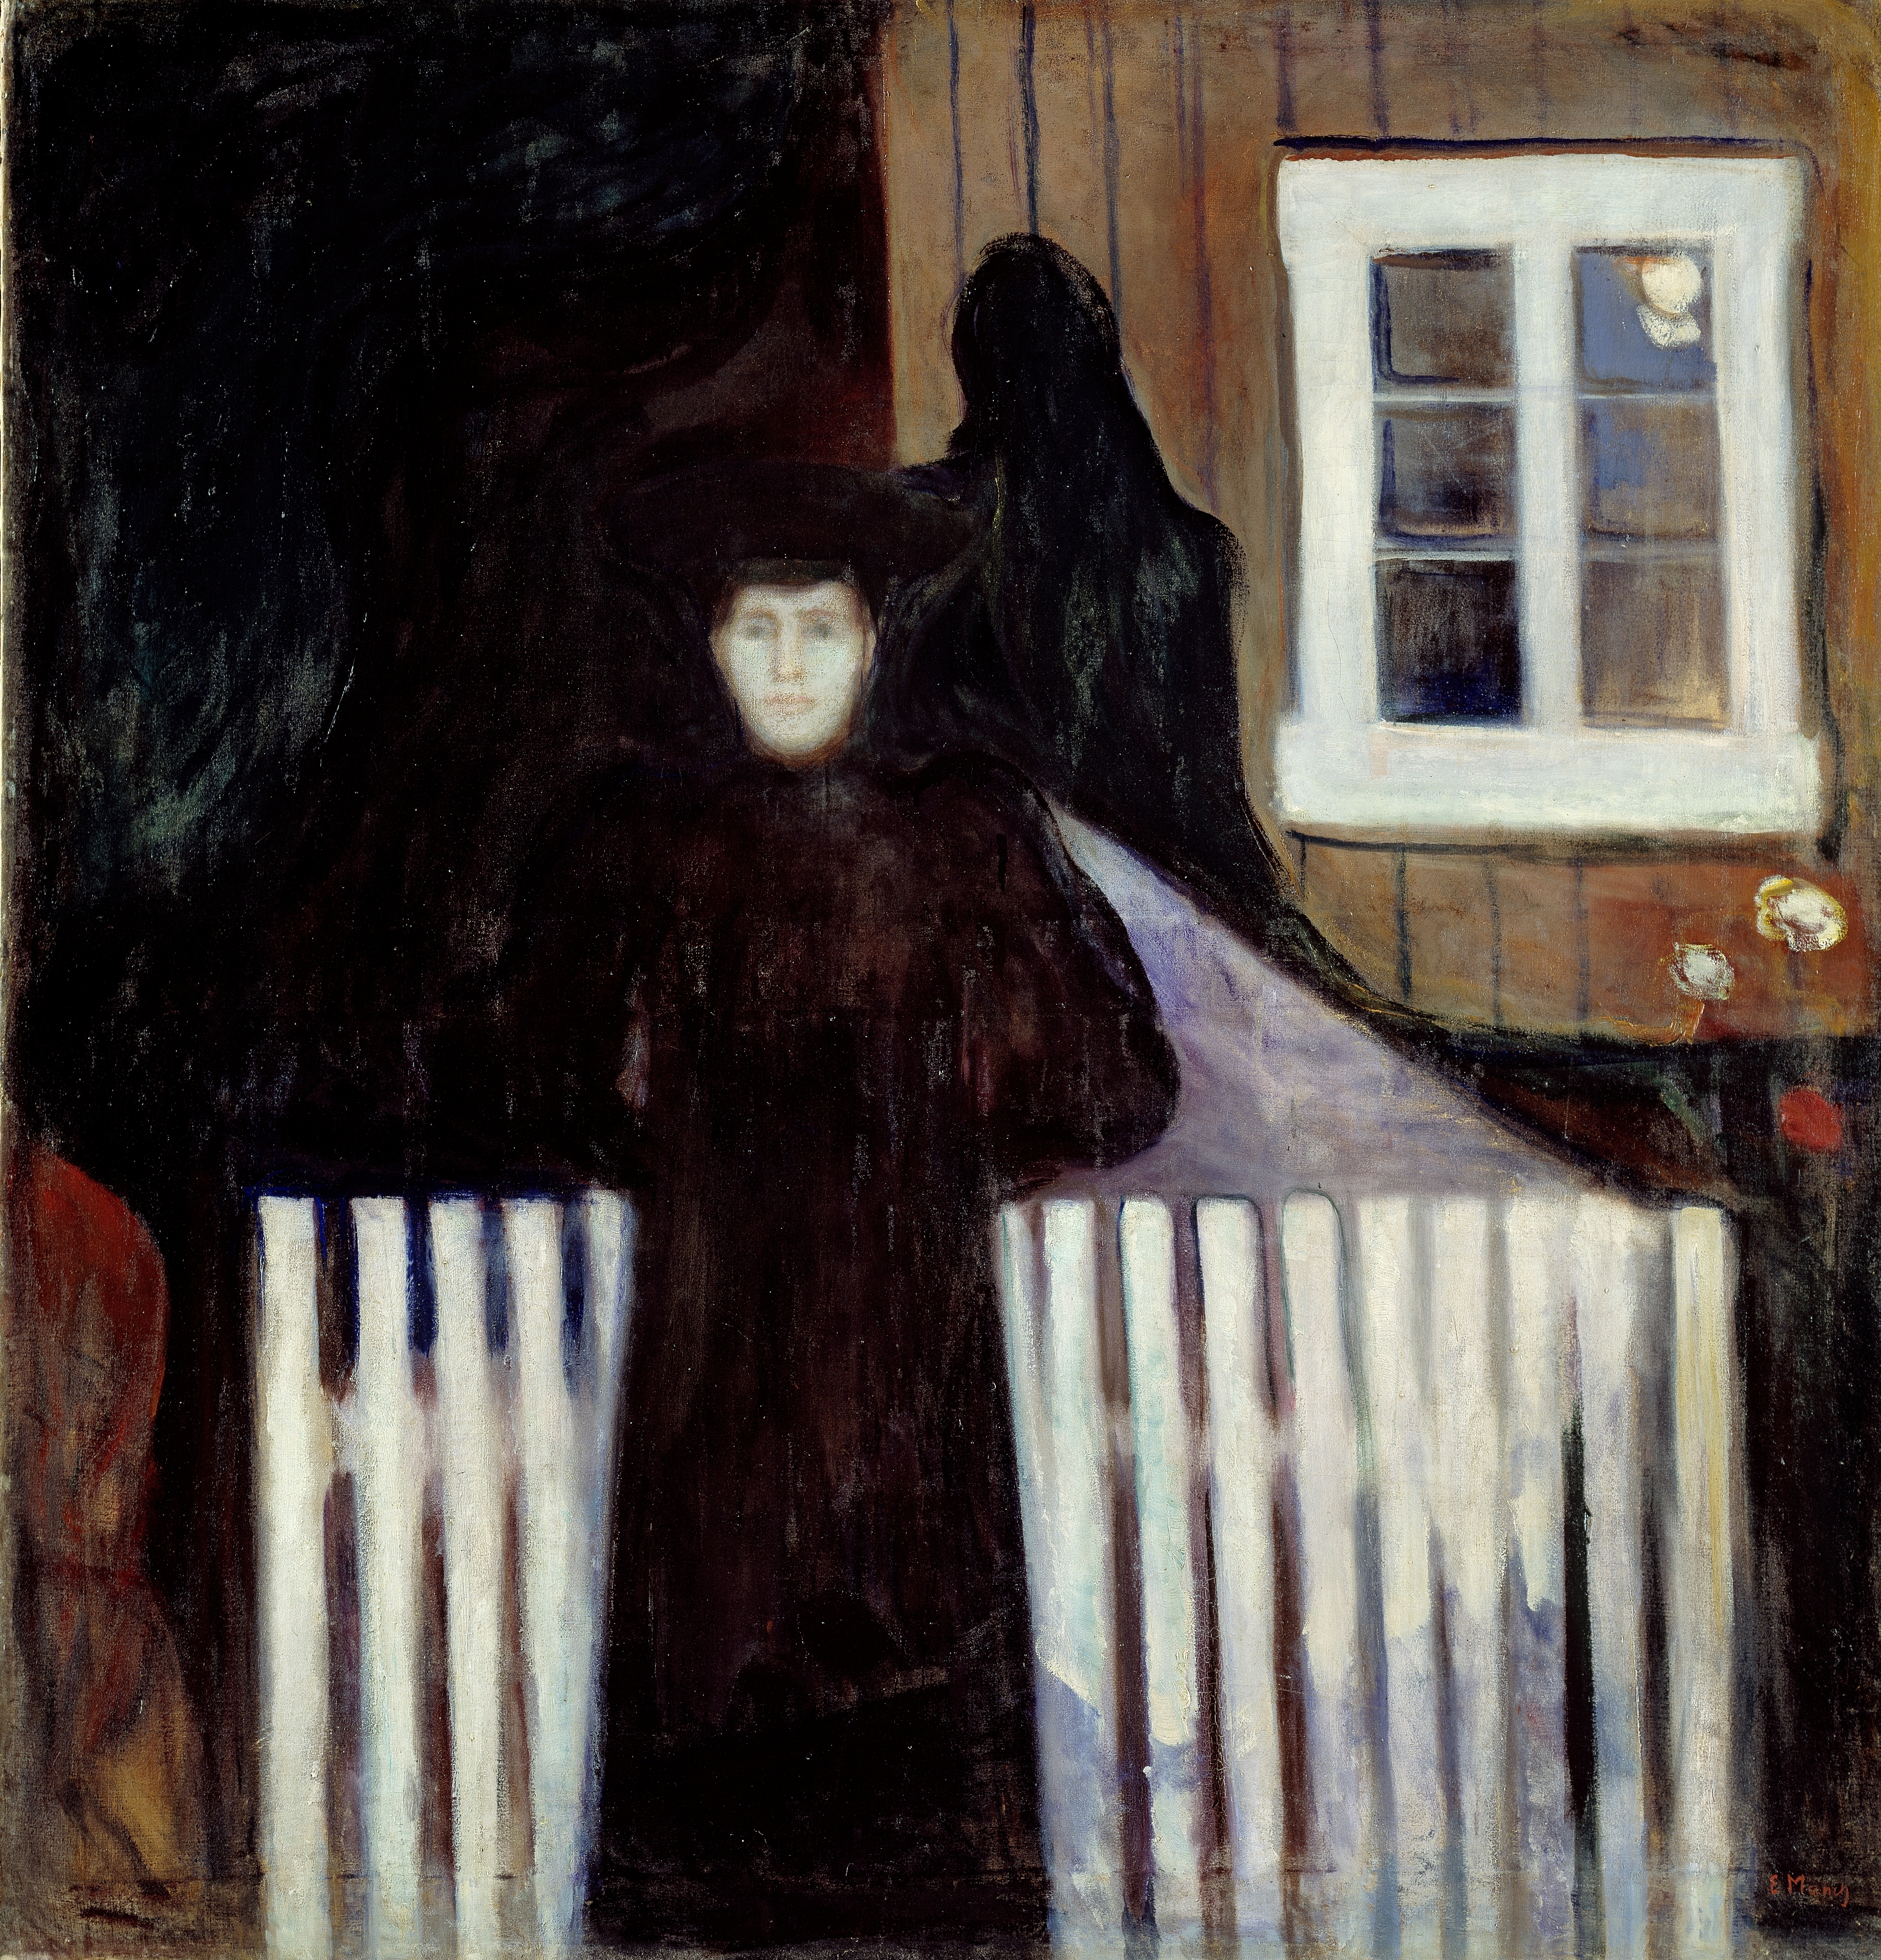
Edvard Munch · 1893
Moonlight
A young woman stands in moonlit shadow beside a wooden fence; a darker figure looms behind her, while a pale window glows on the right. The painting hangs at Norway's Nasjonalmuseet and remains one of Munch's most psychologically charged moonlit scenes.
What we learn: moonlight as architectural light source. Let it strike a single bright shape — a fence, a window pane, a wall edge — and let the rest of your canvas stay almost black. Contrast does the storytelling.
Images: public domain via Wikimedia Commons.
What colours to paint a moon
Moon painting uses only four colours, and every variation in this article is built from these four plus the occasional warm-mix accent. Memorise these hex values and you'll never need to scroll a colour-mixing chart again.
Mars Black
#1d1611
Deep night sky base — covers the entire canvas first.
Crater shadows and mid-tone sponge texture on the moon body.
Phthalo Blue
#1a3260
Mixed with white for the soft atmospheric glow halo around the moon.
Warm-palette swap for blood-moon and harvest-moon variations: replace Cold Gray with Burnt Sienna (deep rust orange) and add a touch of Cadmium Red mixed into the Titanium White moon body. Keep the Phthalo Blue glow — the warm-cool contrast is what makes a blood moon feel ominous rather than flat.
The 70/30 composition rule
The 70/30 rule is a composition guideline that says one element should dominate roughly 70% of your canvas while a contrasting element fills the remaining 30%. The dominant area creates calm; the smaller area creates focus. Anything closer to 50/50 reads as visually flat.
Applied to moon painting: let the dark night sky occupy about 70% of your canvas, with the moon plus any foreground silhouettes (mountains, trees, water) filling the remaining 30%. Position your moon roughly two-thirds up from the bottom edge — never dead-centre. This single choice is the difference between a moon painting that feels stuck on the canvas and one that feels infinite.
The same rule applies to value: 70% darker tones (the sky and shadows) versus 30% lighter tones (the moon body and highlights) gives your work the dramatic contrast that makes the moon glow. If you find your painting feels muddy, the fix is almost always to push one side darker, not to add more colours.
30-min easy moon — for beginners
Easy moon painting for beginners (30 minutes, 1 marker)
No brushes, no palette, no waiting for paint to dry. If you have a black canvas, one white acrylic paint marker, and 30 minutes, you can paint a moon today. This is the simplest possible version of the technique — perfect for kids, classroom projects, or a first-night attempt.
Trace your moon (2 min)
Press a small bowl, lid, or roll of tape against a pre-primed black canvas (or a 12×12 canvas you've covered in Mars Black gesso). Trace lightly with chalk or a pencil. The circle should sit roughly two-thirds of the way up the canvas — not dead-centre.
Sponge the moon body (12 min)
Cover the circle with Titanium White using a barely-damp natural sponge — dab, don't smear. Two pass-overs are enough. Don't try to make it perfectly smooth: the irregular dab pattern is the crater texture.
Splatter stars + add highlights (8 min)
Toothbrush-flick a tiny amount of thinned white paint across the dark sky for distant stars. Then take a white acrylic paint marker and add 6–8 crisp dot-stars in the foreground, plus a few rim highlights on the brightest crater edges of the moon. Done — let dry 8 minutes and hang.
If your dot-stars come out fuzzy, switch from a brush to a paint marker. Marker tips give crisp pen-style edges that brushes can't match — see Chalkola Acrylic Paint Markers.
12 ideas to try next
12 moon painting variations to inspire you
Once you've mastered the basic technique, try these creative variations. Each uses the same core approach — circular shape, sponged texture, atmospheric glow — but every one looks completely different on the canvas.
Variation 01 / 12 · AI-generated preview
Full moon over water
A classic full moon with reflected light shimmering on a still ocean below.
Beginner
Variation 02 / 12
Crescent moon silhouette
A thin sliver of moon framed against a deep blue night sky — minimal detail, maximum mood.
Beginner
Variation 03 / 12
Blood moon
Mix in deep reds and rust oranges across the moon's face for a dramatic eclipse look.
Intermediate
Variation 04 / 12
Galaxy moon
Swirl purple, magenta, and gold around the moon for a cosmic, nebula-style background.
Intermediate
Variation 05 / 12
Misty moon through trees
Soft halo glow filtering through silhouetted branches — the dry-brush atmospheric effect at its best.
Intermediate
Variation 06 / 12
Moon over mountains
Black mountain silhouettes set against a glowing moon — keep foreground completely black for contrast.
Beginner
Variation 07 / 12
Phases of the moon
Paint a series — new, crescent, half, gibbous, full — across one long canvas or eight small panels.
Advanced
Variation 08 / 12
Moon with stars
Toothbrush-splatter white paint across the sky for distant stars before adding the moon.
Beginner
Variation 09 / 12
Moonlit cabin
A glowing moon over a tiny silhouette cabin in the woods — instant cozy night-scene energy.
Intermediate
Variation 10 / 12
Reflective moon
Moon mirrored on a calm lake surface. Use a vertical streak of white below the moon.
Intermediate
Variation 11 / 12
Half moon textured
A half-illuminated moon with sharp shadow line down the middle — ideal for showing crater depth.
Advanced
Variation 12 / 12
Glowing super moon
An oversized moon that fills most of the canvas — gives you room for intricate crater detail and subtle color shifts.
Advanced
6-step howto
Step-by-step: how to paint a moon in acrylics
Total time about 60–75 minutes including drying. Each step builds on the last — don't skip the layered approach or your craters will lose depth.
Paint the night sky background
Cover your entire canvas with Mars Black acrylic paint using a wide flat brush. Apply two coats for solid coverage, letting each dry 10 minutes. This deep black makes your moon stand out dramatically.
Create the moon circle
Use a bowl, lid, or compass to trace a circle in the upper portion of your canvas. Fill the circle with Titanium White paint, applying 2–3 coats until no black shows through. Let dry completely.
Add crater texture
Load a natural sponge with Cold Gray paint (barely damp). Dab the sponge randomly across the white moon surface, creating irregular clusters that mimic impact craters. Vary pressure to create lighter and darker spots.
Build crater depth
Mix white and gray to create a mid-tone. Dab this along one side of your gray crater spots to simulate sunlight hitting crater rims. This contrast creates three-dimensional depth.
Create the atmospheric glow
Mix Phthalo Blue with white to create a pale blue-gray. Using a dry brush, blend this color in a halo around your moon's edge, fading it into the black sky. Build the glow gradually in thin layers.
Add final highlights
With pure Titanium White on a small brush, add tiny bright spots on crater rims and the moon's edge where "sunlight" hits strongest. These sharp highlights make your moon appear luminous. Let your finished moon painting dry for 24 hours before displaying or framing.
Real reviews from beginner to professional artists who used Chalkola for moon paintings, gallery work, and wall décor.
4.7★
Average rating
24K+
Verified reviews
96%
Would recommend
10–15min
Acrylic dry time
★★★★★
"I painted my first moon following the steps in this article using the 24-tube set — the Mars Black laid down opaque in two coats, which is exactly what I needed for the dark sky. The Phthalo Blue glow at the moon edge made the whole thing look professional."
Maya R. · Verified Amazon buyer
★★★★★
"Bought the 95-pc kit specifically because the easel was included. The canvas panels are stiff enough that the sponge texture didn't warp the surface — a problem I've had with cheaper canvases. Crater detail came out crisp."
Jenna L. · Verified Amazon buyer
★★★★★
"I'm a beginner and the pigment load on these tubes shocked me. White covers black in TWO coats, not the four or five I had to do with student-grade. Saved me hours on my first moon project."
Olivia T. · Verified Amazon buyer
★★★★★
"Used the Acrylic Paint Markers for the fine star highlights and tiny crater rim details — pen-style control made the difference. No bleeding, no fuzzy edges. The two-tip system means I have one marker doing two jobs."
You need black, white, and grey acrylic paint, plus optional cream, beige, or pale yellow for warm glow highlights. A starter 6-colour set covers every variation. Use titanium white for the brightest craters and a soft round brush for stippling the texture.
Stipple uneven grey and white dots with the tip of a round brush to mimic craters, then soften the edges with a barely-damp flat brush. Reference a real moon photo — craters are not evenly spaced, some cluster in shadows, and the largest craters sit near the upper-left in most views.
A beginner moon painting takes 1–2 hours including drying. The black background needs 2 coats with 15 minutes between each, the moon base takes 30 minutes, and the texture and highlights another 30. Using a hair dryer on the cool setting cuts drying time in half.
A 10×10 or 12×12 inch stretched canvas gives a gallery-ready look, but canvas panels and primed wood panels both work. Dark-toned canvases skip the black-background step entirely — look for pre-primed black canvases at any art store.
Paint a soft halo of diluted white around the moon, then layer a thin wash of pale yellow or cream directly on the moon's brightest areas. Blend outward while wet. The contrast between the warm glow and cool dark background tricks the eye into seeing light.
Yes — moon art is a great family project. Kids can stipple crater texture, splatter star droplets, and mix grey tones. Use washable acrylic or student-grade paint on canvas panels instead of stretched canvas to reduce mess and cost, and wear old clothes.
To paint a realistic moon, you need Mars Black for the background sky, Titanium White for the moon base, Cold Gray for craters and shadows, and Phthalo Blue for atmospheric glow. These four colors create depth and dimension when blended properly.
Acrylic paint is ideal for moon art because it dries quickly, blends smoothly for atmospheric effects, and builds opaque layers for bright highlights. The fast-drying property lets you layer craters and add glow effects without waiting hours between steps, unlike oils or watercolors.
Yes, moon paintings are beginner-friendly because the technique uses simple shapes and forgiving sponge texturing rather than precise brushwork. The circular moon shape is easy to trace, and the sponge-dabbing method for craters hides brush strokes, making it perfect for artists just starting with acrylics.
Create a glowing moon effect by blending Phthalo Blue and white around the moon's edges into the black sky using a dry brush. Build the glow in thin layers, starting darker farther from the moon and lighter closer to it, creating a soft halo that mimics atmospheric scattering.
Four acrylic colours: Mars Black for the night sky, Titanium White for the lunar surface, Cold Gray for crater shadows, and Phthalo Blue mixed with white for the atmospheric halo. For a blood-moon or harvest-moon variation, swap the Cold Gray for Burnt Sienna and add a touch of Cadmium Red mixed into the white — keep the Phthalo Blue glow for warm-cool contrast.
The 70/30 rule says one element should dominate about 70% of your canvas while a contrasting element fills the remaining 30%, creating focus through unequal weight. In moon painting, let the night sky take 70% of the canvas and place the moon plus foreground silhouettes in the remaining 30% — and position the moon two-thirds up from the bottom edge, never dead-centre.
The three most-studied moon paintings in art history are Vincent van Gogh's The Starry Night (1889, MoMA — swirling crescent with halo), Caspar David Friedrich's Two Men Contemplating the Moon (1819–20 — a tiny moon and vast sky that lets silence do the work), and Edvard Munch's Moonlight (1893, Norway's Nasjonalmuseet — a young woman in moonlit shadow beside a wooden fence, with a darker figure looming behind her). Each one teaches a different technique: exaggerated halo, scale, and architectural light.
The fastest beginner moon takes 30 minutes with one paint marker: trace a circle on a pre-primed black canvas, sponge Titanium White over it for crater texture, then toothbrush-splatter thinned white for stars and add crisp dot-highlights with an acrylic paint marker. Skip brushes entirely on your first attempt — the marker gives crisp edges that brushes can't, and the sponge handles the texture for you.